|
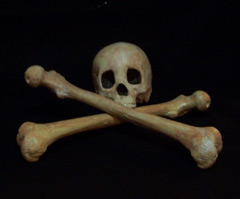
Distressing the Bones
 Its
important to remember that
the Bucky skeleton, skulls and bones are manufactured primarily for the medical industry
and are not meant to look as though they have been buried for
the last
hundred years. Over time, they become slightly yellowed and
stained, or at least the ones in our basement have... Its
important to remember that
the Bucky skeleton, skulls and bones are manufactured primarily for the medical industry
and are not meant to look as though they have been buried for
the last
hundred years. Over time, they become slightly yellowed and
stained, or at least the ones in our basement have...
As a Halloween
prop, you will want to make some improvements
to create that "fresh from the grave" look.
Many years
ago, we developed a way to distress the solid plastic that a
Bucky skeleton, skulls and bones are made of. The process
was suitable for a commercial haunt, but was expensive and time consuming
(Click here to
read our original method).
So we came up with a simple way to make these Halloween
skeletons, skulls and bones look old quickly and at a low cost.
In this article we will show you how to transform
a white femur bone into an aged and stained looking
Halloween prop for just pennies and in just a few minutes.
While we used a femur in this example, this same technique
can be used for skulls, other bones and full size Bucky
skeletons (available at the
Skeleton Store).
Materials
Eggshell Acrylic Craft Paint
Golden Harvest Acrylic Craft Paint
Nutmeg Brown Acrylic Craft Paint
Latex or Vinyl Gloves
First, wash
the femur with soap and hot water to remove any oils that
might be present from the manufacturing process that might
hinder the paint from sticking. Dry the
bone thoroughly with paper towel. Lay
down some newspaper or a sheet of cardboard on your work
surface to protect it from the paint.
Squirt about half teaspoon of the Nutmeg Brown
paint onto a paper plate. On the other side of the plate,
squirt a teaspoon of the Eggshell paint and add a few drops
of Golden Harvest paint with a and mix these two together.
Its very easy to make this mixture to yellow, you just want
to slightly yellow the bone.
Slip on a
pair of latex gloves and dip a finger
into the Golden Harvest / Eggshell paint mixture and rub your
fingers together on that one hand to coat the fingers of the
glove with the paint. Holding the femur in the other hand,
move you fingers over it, coating it with the paint. You
don't need to get every crack and crevice, as bones do not
age evenly.
Now
dip the tip of your index finger into the Eggshell paint and
as before, rub your fingers together to coat the fingers of
the glove with the paint. Gently stroke this over the first
layer of paint from one end to the other. The bone is now
aged, but needs to be stained.
Dip the tip
of your index finger into the Nutmeg Brown paint and as once
again, rub your fingers together to coat the fingers of the
glove with the paint. Using the tips of your fingers, stroke
the bone from one end to the other. In this case you want to
add stain like streaks, not coat the bone. Let the paint dry
and you are all set. It is important to note that bones
distressed in this manner will should not be exposed to high
levels of moisture or water, as the paint may begin to bleed
off.
Darkening
the Cavities
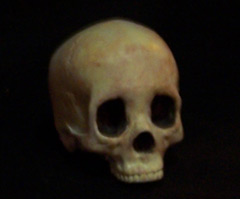
 We think that skulls look a lot scarier when the
inside of the facial
sockets have been darkened to give the impression that they
are open all the way through to the cranium. We think that skulls look a lot scarier when the
inside of the facial
sockets have been darkened to give the impression that they
are open all the way through to the cranium.
To do this we
use black and brown acrylic craft paint and carefully paint the inside of
the each eye socket and the nasal passage with a cotton swab.
First with a light coat of black and then the same with the
brown paint.
◄BACK
|