 Throughout ancient times it was
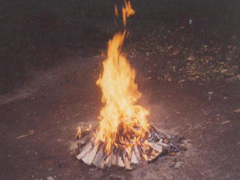
a tradition to burn bonfires at the end of Summer and when
the last harvest was brought in, usually on or around October 31st.
For Witches and other magical people, this was an important
part of celebrating their end-of-the-year holiday. These
special bonfires warded off evil and provided light and warmth for
their annual festivities.
The bright light of a bonfire
tends to attract a lot of flying insects, which in turn
attracts hungry bats. So, if you looked in the sky above the fire, you would see lots of bats flying around.
Click here to read our story about Austin, Texas and
their wonderful bat population. Bats are also
associated with vampires, being of the main creature
that vampires tend to shape-shift into.
As a very recognizable symbol of
Halloween, bats should not be left out of your Halloween
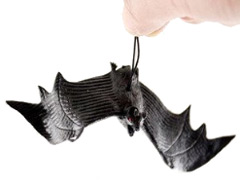
decorations. To hang one or more rubber bats from the
ceiling in your home, your front porch or even from tree
limbs is quite simple and quick to do with the right tools.
Materials
For this project, we bought three different sizes of
rubber bats including ten small (four inch wingspan) rubber bats.
Three medium (eight and a half inch wingspan) and
three large (twelve inch wingspan) rubber bats. The
small bats were purchased at a local Halloween store
and the medium and large bats at a drug store chain.
Light-weight fishing
line. This is available in the sporting goods
section in most department stores. Depending on the
height of your ceiling, cut lengths of fishing line between
one and three feet in length.
You will also need some
clear glue, such as "Tacky Glue", a large
sewing needle and two white head
thumb tacks for each bat you are going to hang.
Stringing the Medium and
Large Bats
 The medium and large size bats come with a piece of black
elastic cord running through there backs to hang them by.
However, this cord is very noticeable in a lighted area, so
we decided to use light-weight fishing line. We just cut the
knot in the cord on the underside of the bat and then pulled
the cord completely out of the bat from the other side.
Thread some of the fishing line
on a large needle that is long enough to go all the way
through the body of a large bat and push the threaded needle
all the way through the hole in the center of the bat where
the cord was from the top and out the bottom. Tie a small
knot in the line sticking out of the underside of the bat
and cover the knot with a small drop of clear glue, such as
"Tacky Glue". Once dry, the glue will prevent the thread
from slipping back through the hole.
Stringing the Small Bats
Since the small bats do not come with a hanging cord, we
used a slightly different method to string them. First, find the center of gravity of the bat by balancing it
on a finger tip. When it stays level, you have found the
center.
Next, thread some of the fishing
line on the needle and push it all the way through the center of the bat from the
top and out the bottom. As with the larger bats, tie a knot in the
line
sticking out of the underside of the bat and cover the knot
with a small drop of clear glue.
Attaching the Bats to the
Ceiling
Attach the
other end of the fishing line to a tack by tying a slip knot at
the end of the line, looping it over the shaft of the tack
and pulling it taut. Stick or lightly hammer the tack into the
ceiling where you what the bat to hang. Hang the bats at slightly different levels and in
an
asymmetrical pattern. Don't bunch them all together.
|
  Bat
House - Did you know that just one
little brown bat can eat as many as six
hundred mosquitoes in a single hour!
They also feed on other pesky night
flying insects. Bat
House - Did you know that just one
little brown bat can eat as many as six
hundred mosquitoes in a single hour!
They also feed on other pesky night
flying insects.
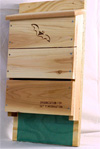
Setting up a
bat house is a great way to help control
flying insects and give bats a nice home
to live in. Bat houses are available
online and are very inexpensive. The
single-celled bat house shown to the
right can hold as many as a hundred
small bats. |
|
◄BACK