We wanted to enclose
our 2009 Halloween Tree display with a small,
spooky looking picket style Halloween fence. In this
article we will show you how we built this fence using
materials from our local hardware store.
Remember that this was for a specific project of ours,
but you can adjust the dimensions and size of lumber to
suit your personal needs. We first cut the boards so
that we had two that were five feet long and four that
are two and a half feet long. The long boards are the
fence braces and the survey stakes will act as the
pickets.
Materials Used
3 - 1"x2"x8' Boards
22 - 9/16"x1-3/8"x17-1/2" Wooden Survey/Grade Stakes
44 - 1-1/4" Nails
1 - Gray and Brown Acrylic Crafts Paints
4 - Small 1-1/2" Hinges (with screws)
 To build the
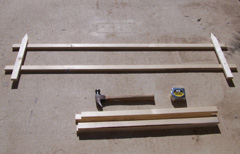
five foot long section of our Halloween fence, we laid the two five foot long boards
on a flat surface separated by seven inches on the
inside.
We placed a picket (survey stake) on top of the two
fence braces at either end, two and a half inches from one end and
four inches of the picket extending below the bottom fence
brace, and nailed the picket to the two brace boards.
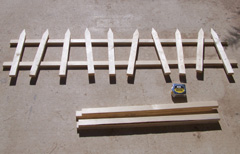
 Next,
we added
eight more pickets in between the two end pickets for a
total of ten. Since
this is a Halloween fence, we didn't want it to look
perfectly built or new, so we spaced our pickets at
slightly different distances apart and a few of them at slight
angles. We did keep the bottoms of the end pickets
at the same distance below the bottom fence brace (four inches)
so that it would sit straight.
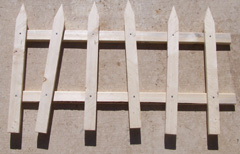
 For the two small
Halloween fence sections, we followed the same method that was used for
the long section, except we used a total of six pickets
per section.
On one of the small sections, one end
picket was placed right at the end and another picket
two and a half inches from the other end. One the second
small section we did the same, except reversed the
placement of the pickets at the ends.
 White
pine, the wood that most of these stakes are made of, is
a very light colored wood and not very spooky looking,
so we stained the entire fence with a light brown
colored, water-based stain.
We
diluted the stain 50/50 with water and applied it with a
medium size brush.
 Lastly,
we attached the two small fence sections to the
long fence section using the four small hinges. This allows
us to angle the smaller
sections, so that the fence will not fall over.
It also
lets us fold these sections back against the larger
section for easy storage. We also painted the hinges to
roughly match the color of the wood to camouflage them.
◄BACK